LAB: Let AI Write Your Commit Message

A focused workshop for working developers who need to use AI right now, in real projects, under real time pressure.
Let's face it: writing commit messages is annoying!
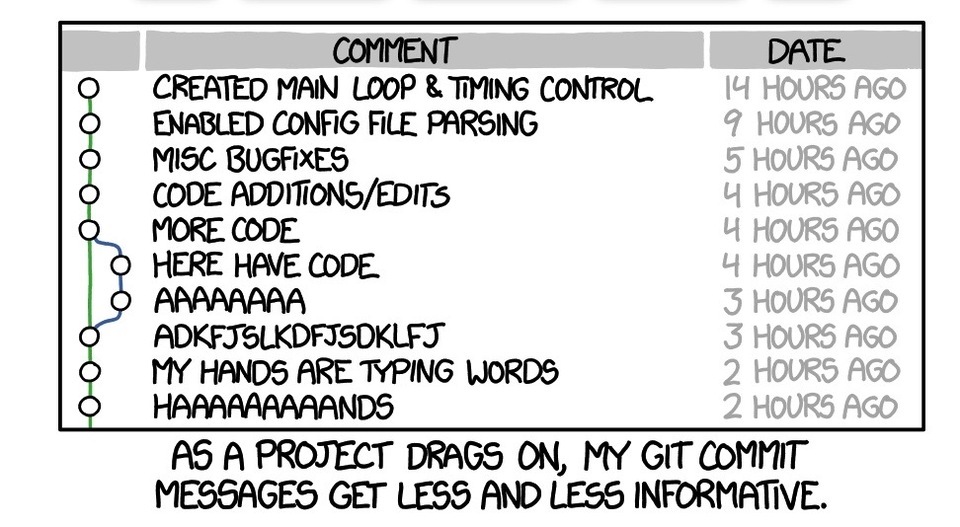
XKCD image from https://xkcd.com/1296/
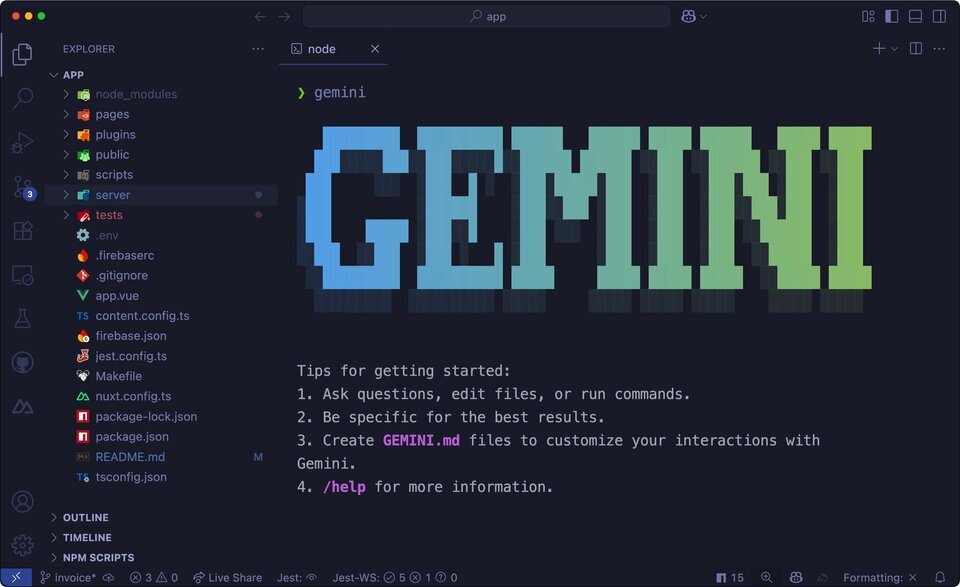
In this lab we'll be using Gemini as we're going to revisit this topic in a later session on using instructions and for that, we'll be using VS Code.
Let's get started!
Step 1: Add our changes and open a terminal and start up Gemini
We've added two files to our project which we'll need to stage in order to create a commit message. Let's do that first:
git add .
With that done, we can move on to working with Gemini.
I'm using VS Code's terminal here, right in the editor window. When you start up Gemini, it scans the current working directory for context and will have a lot of information right from the start:
Step 2: Think about the prompt
This is a live project with changes that are ready to be committed, as you can see on the left side of the editor in VS Code's source control tab. We know that if we wanted to see what changes are pending, we could execute a simple command… but what is that command?
We know that Gemini can probably figure it out for us, but since we're here, it's good to know, isn't it?
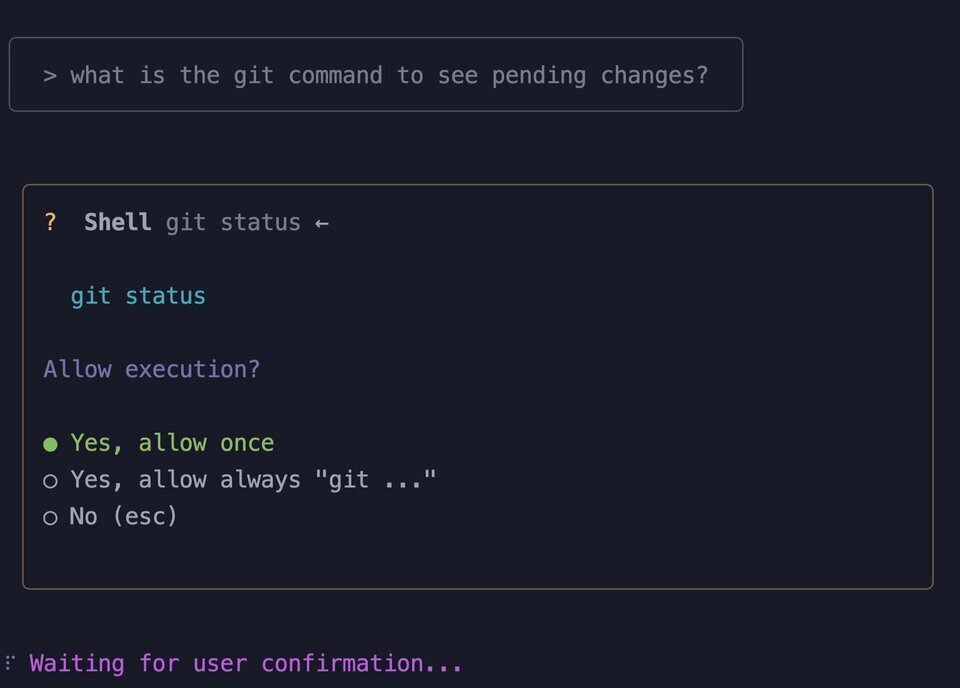
Ah, right: git status.
Let's see how Gemini handles this.
Step 2: The first try
Working with AI is an iterative process, especially when you're getting started. It's difficult to understand what the AI will try and do, so you just have to wing it, refine, and try again. This is the major reason we're using Git! Small steps, commit often so we can rollback.
What we want is for Gemini to create a commit message for us based on the pending changes. This might seem trivial for what we're doing, but when you've made 20-30 changes across different files, it can be tough to remember everything.
Let's try this:
Create a git commit message based on the pending change
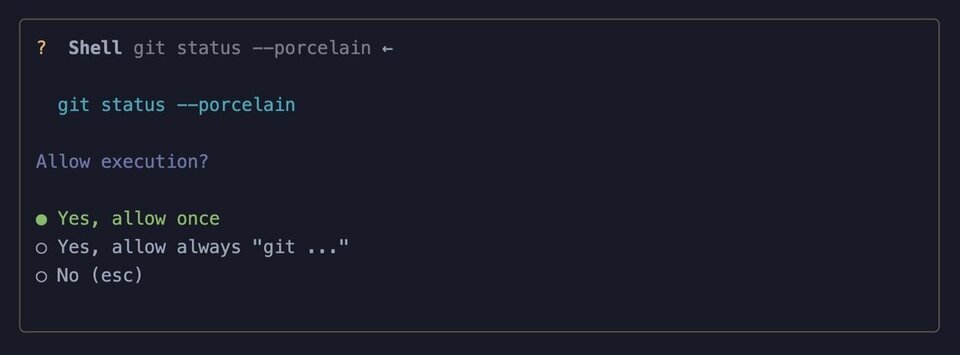
As expected, we see git status. Allow the command to run, but don't "allow always"… not yet. That can be a destructive choice until we better understand what Gemini is going to do.
You should now see a screen that looks something like this:
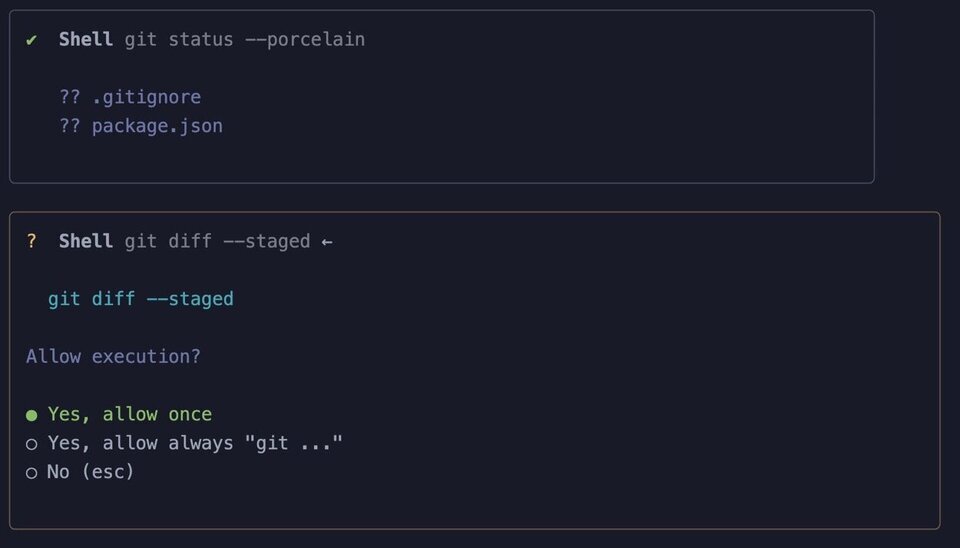
The first pane is the result of the command. The second pane is what Gemini has decided the next step should be. Once again, allow once.
You should see a splash of text now, which is the result of the git diff command, ending with the underwhelming response:

Yes, we could have created this ourselves, so why are we even doing this? That's a good question - let's find out.
Step 3: A better prompt with more context
We're moving very slowly on purpose, learning how to prompt, but also learning that we don't need to accept the first answer. We can explore, see what else is possible.
Let's tweak our prompt:
Add some detail to the this message given the context in the chat history and add some detail about your involvement.
This is much better:

The details provided here are important to understand when reviewing your commit history, especially the fact that you're using Gemini.
This is good, but it's a bit verbose. Let's refine it a bit more.
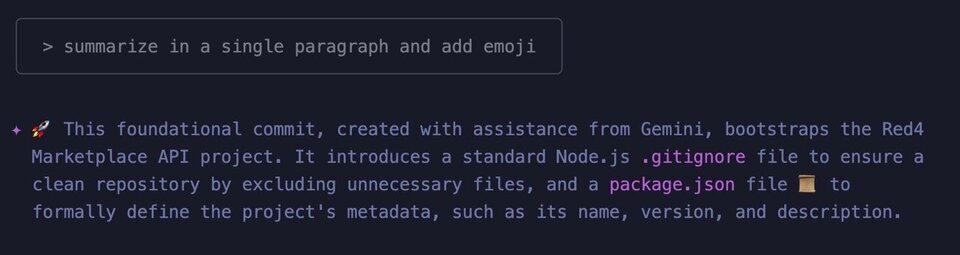
Step 4: Making the output just right
Commit messages that are too long are annoying, so let's trim it down to a paragraph and add some life to it.
Add this as your next prompt, keeping in mind that the chat history will give the context you need.
summarize in a single paragraph and add emoji
Now this is a good commit message!
Play around here, and see what other things you can add that your company might want to see.
Coming Up
We'll go further with this process in the next session but, for now, it's important to understand the prompting process, and how you can get what you want with a little extra work. As time goes on, you'll become more and more used to understanding that you're working with a machine that will give you exactly what you're asking for.
A focused workshop for working developers who need to use AI right now, in real projects, under real time pressure.