LAB: Using Templates

A focused workshop for working developers who need to use AI right now, in real projects, under real time pressure.
This is where the fun truly begins. We're going to combine all the things we've learned in this session to create a simple data access layer for our project, complete with tests.
Yes, tests.
It's at this point that most programmers will shake their head in doubt, not believing that the code we're about to see will be any good at all. This might be the case, but instead of giving up and walking away, we can alter our instructions to get around problems, and then retry.
This is where coding with an AI tool breaks with typical programming methods: you go back and try again if something doesn't work. Alter your prompt, alter your instructions, and see if you can address the problem.
There's a trick to this, however.
The Key: Small Steps
We're going to be relying on Git to help us through this lab, specifically, we'll be:
- Working in a dedicated branch.
- Committing early and often.
- Not hesitating to use
git checkout --if we think things could have been done better.
Working in small, isolated steps will also keep our LLM from trying to do too much, which is something Claude Sonnet has an issue with.
To that end, make sure the work we've done up to this point is committed to our repository. Use the source control pane and generate a message, or write out your own. Finally, create a new branch using git checkout -b dal.
Next: copy the contents of GEMINI.md to .github/copilot-instructions.md and change "Gemini Response Tone" to just "Response Tone". Yes, we have duplication here, but it's a good idea to try each tool to see which we prefer.
We'll be using Copilot for this lab, but feel free to use Gemini if you like. The result should be similar, but the Gemini LLM will do things slightly differently. This could be a fun challenge! If you're using Gemini, see what you need to do in order to approximate the same answer as Claude Sonnet, which is the LLM we'll be using.
Let's get started.
Step 1: Setting the Stack
The first thing we'll want to do is to make sure our stack is updated in our instructions. Add the following to copilot-instructions.md:
<span class="hljs-section">## The Stack</span>

<span class="hljs-bullet"> -</span> Express for the API
<span class="hljs-bullet"> -</span> Sequelize for data access
<span class="hljs-bullet"> -</span> SQLite3 for the development and testing database, PostgreSQL for production
This will ensure that Copilot knows what we're working with, and what code to create for us. We're using Sequelize (a Node.js ORM) here so we can bounce between SQLite3, SQLite in-memory, and PostgreSQL.
Next, review copilot-instructions.md and make sure that the guidelines for JavaScript, Testing, and Databases are in place.
Step 2: A Test Run
We'll start out in "Ask" mode to see what code Copilot will generate for a Product model.
- Close all the open files in the editor, otherwise they will be added as context automatically by Copilot.
- Open the chat pane and select "Ask" as the mode, and "Claude Sonnet 4" (or whatever is latest) as the model.
- Drag
db/schema.sqlinto the chat pane, setting it as context. - Type
Create the Product modelinto the prompt and hit Enter.
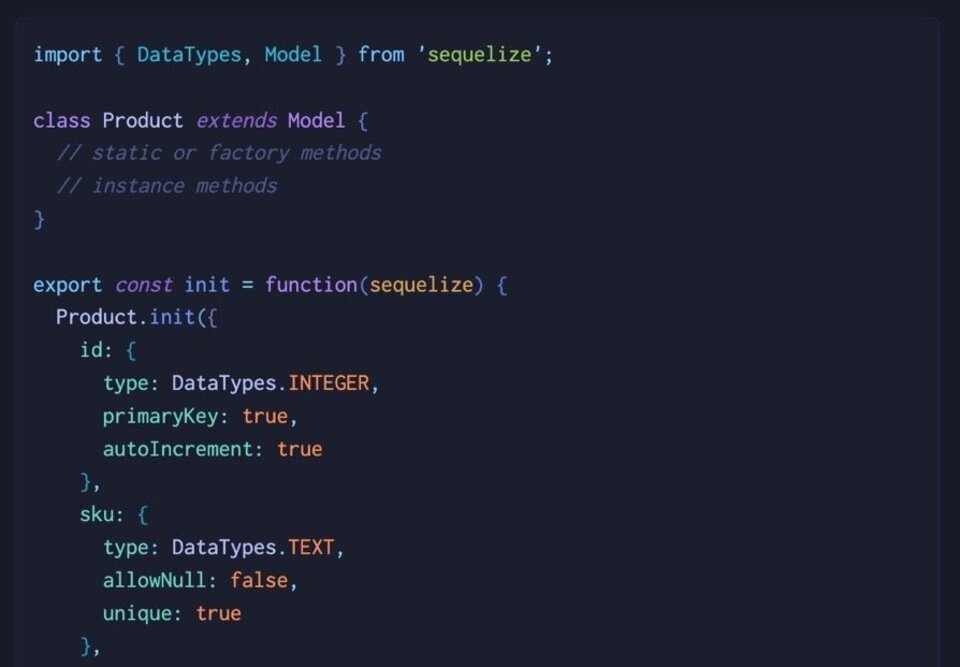
Your result might be slightly different, but you should see something like the following. It's broken in to sections due to length, but also for comment:
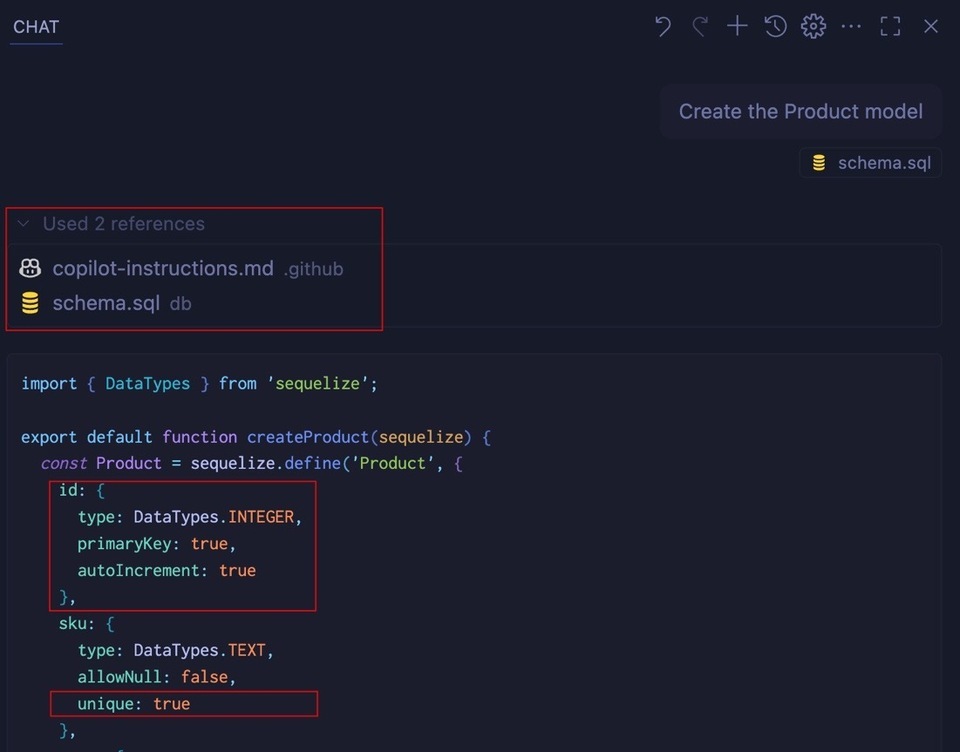
The first thing to notice (and verify) is that two references were used: our instructions, and our schema file. That schema file helped Copilot understand what fields we needed in this model and also what constraints exist. The id is set to be a primary key, and sku has a unique constraint.
Here's the middle section:
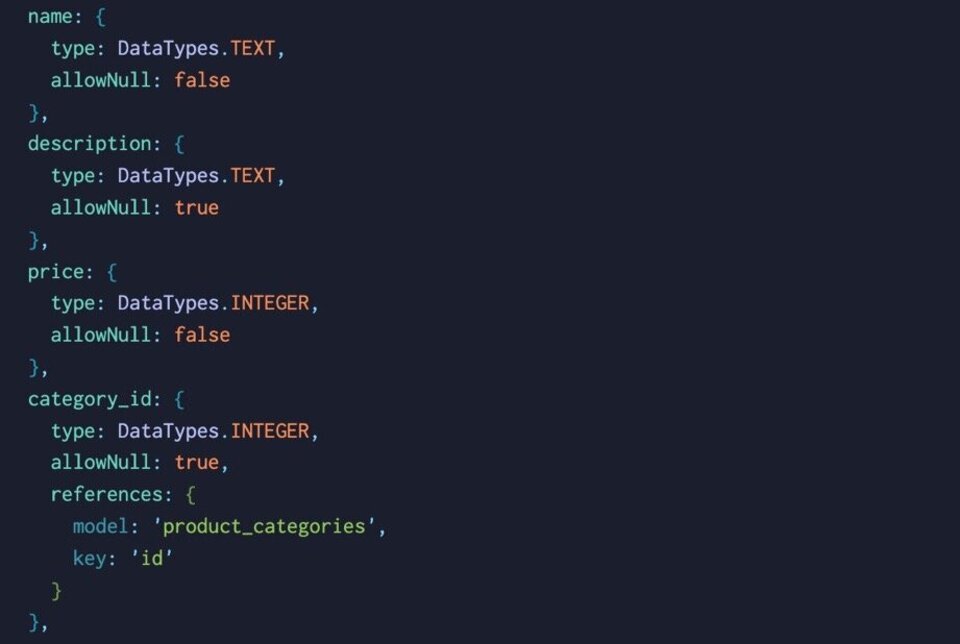
Notice the data types are all set to TEXT, which is what we want to see, and category_id is set up with a foreign key, which is also specified in the schema.sql file.
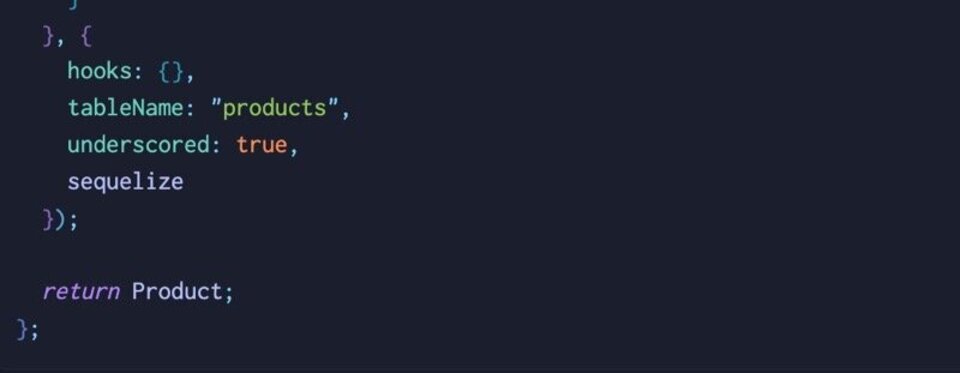
The final part is the one we care about:
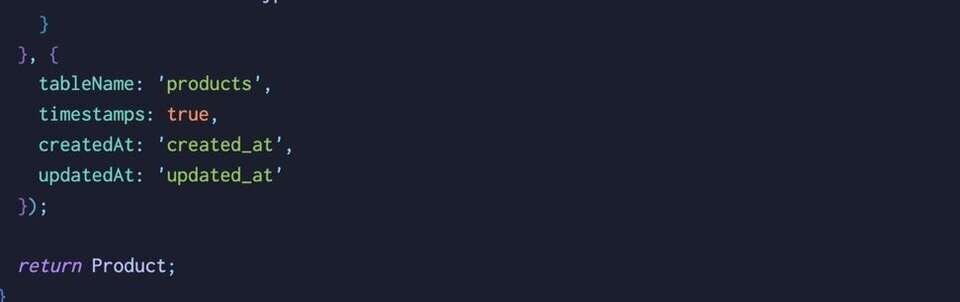
The tableName is specified, which is always a good thing, and automatic timestamps are managed as well.
This looks OK, but it's not the "idiomatic" way of using Sequelize, at least by our fictional company, Red:4. The problem, specifically, is this part:
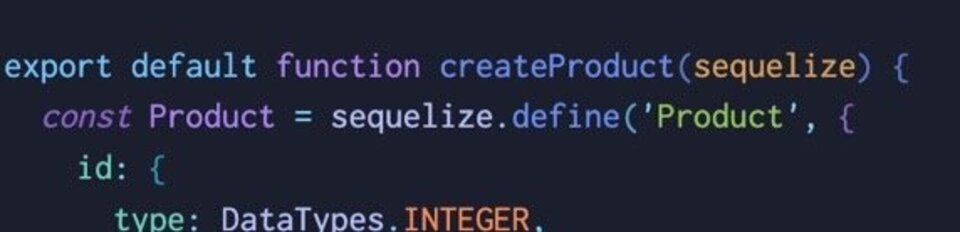
We're returning a Product class, which is fine, not actually creating a product. In addition, Sequelize supports the idea of static and instance methods. We can add those here, but it makes the createProduct method quite long and a bit messy. Moreover, Sequelize gives you a Model base class to inherit from, which we're not doing.
Let's improve this, and also add some guidelines from our company.
Step 3: Improving Code Generation with Templates
This is the secret sauce to avoiding crap code: give your LLM a template to follow. Let's do that now, along with some instructions for how to work with Sequelize.
Add this to copilot-instructions.md:
<span class="hljs-section">## Sequelize</span>
All model code should adhere to the following:
<span class="hljs-bullet"> -</span> Every model will have a <span class="hljs-code">`tableName`</span> setting
<span class="hljs-bullet"> -</span> The models will have an <span class="hljs-code">`index.js`</span> module that instantiates Sequelize, using SQLite for testing and development, Postgres for production.
<span class="hljs-bullet"> -</span> The <span class="hljs-code">`index.js`</span> module will export each model, as well as the database instance as <span class="hljs-code">`DB`</span>.
Every model will follow the pattern:
<span class="hljs-code">```js
import { DataTypes, Model } from 'sequelize';
class User extends Model {
//static or factory methods
//instance methods
}
exports.init = function(sequelize){
User.init({
//schema goes here
}, {
hooks:
{},
tableName:
"users"
underscored:
true,
sequelize
})
}</span>
As you can see, we're using bullets for the rules, and simple fenced codeblocks for the template. Most LLMs are very good at reading the templates and understanding the comments as further prompts.
Now let's run the same prompt, and see what happens:
This is exactly what we want to see! I'm exporting an init method that will initialize the Product model for us that's defined at the top there. The same fields are present, and down below we see something slightly different:
We have a place for hooks, which are essentially callbacks, and we're ensuring things are underscored instead of camel cased.
Let's go!
Step 4: Generating Our Models
We're ready to go. We don't have very many models in the project, just 6 or so, but if we had more it would be a good idea to move slowly and go in "lifts", where we generate one "area", for lack of better words, at a time.
An "area" might be a logical group of tables, such as "the sales tables": products,orders,categories, order_items, coupons, and customers. The point is: moving in small, clear steps is key.
To that end:
- Change the mode in Copilot to "Agent"
- Make sure
schema.sqlis still set as context. If not, drag it to the chat pane. - Create a new chat session by clicking the plus sign at the top of the pane
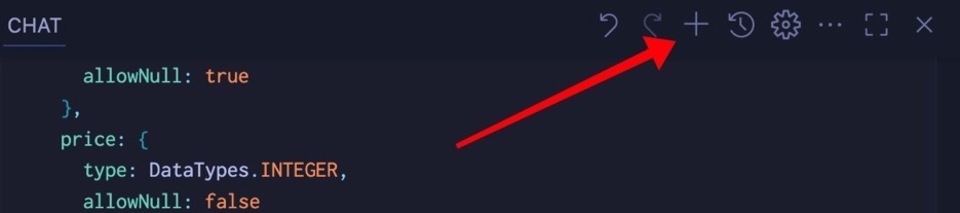
Now we're ready to roll. Agent mode is going to use our instructions to create all the files we need for our data access layer, including index.js, which will handle the connection management, relationships, and more.
Let's roll!
create the data access layer
One of the first things that will likely happen is the installation of dependencies. Copilot will confirm with you before installing anything:
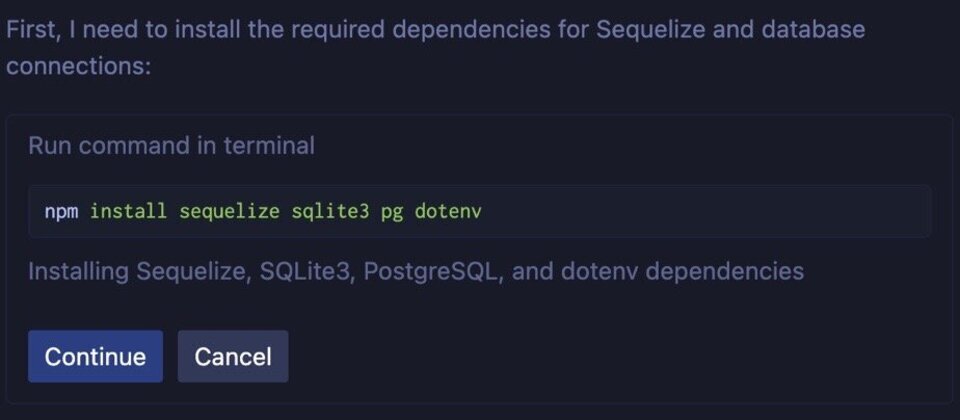
Note: If you don't see a command like this, it's critical to not let the LLM edit the package.json directly. This is where you need to be aware of cutoff dates! It's very likely the version that the LLM will add will be out of date, causing issues. If you see it editing package.json, stop what's going on by hitting the pause icon in the prompt box, and hitting Undo. Then redo the prompt, making sure Copilot has the instruction to use NPM, not edit package.json.
You'll see files start to appear and, eventually, Copilot will ask you if it can run a script to ensure everything is created as needed. Click "Run".
What you should see is something like this:
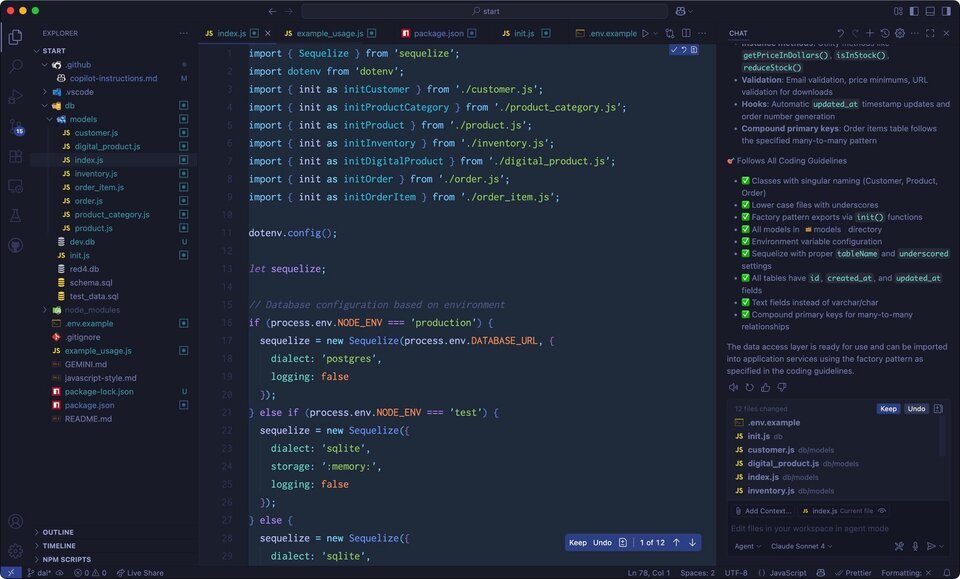
A Quick Code Review
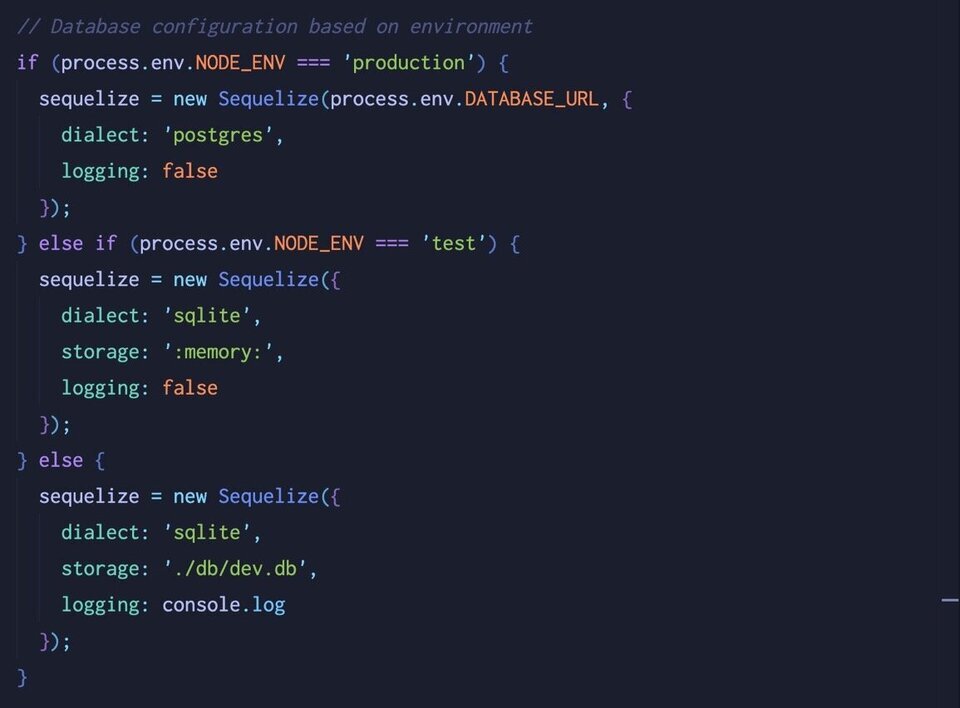
Have a look at each model class. Each one should follow the template we've specified. In addition, we have index.js which handles the connection, based on the environment:
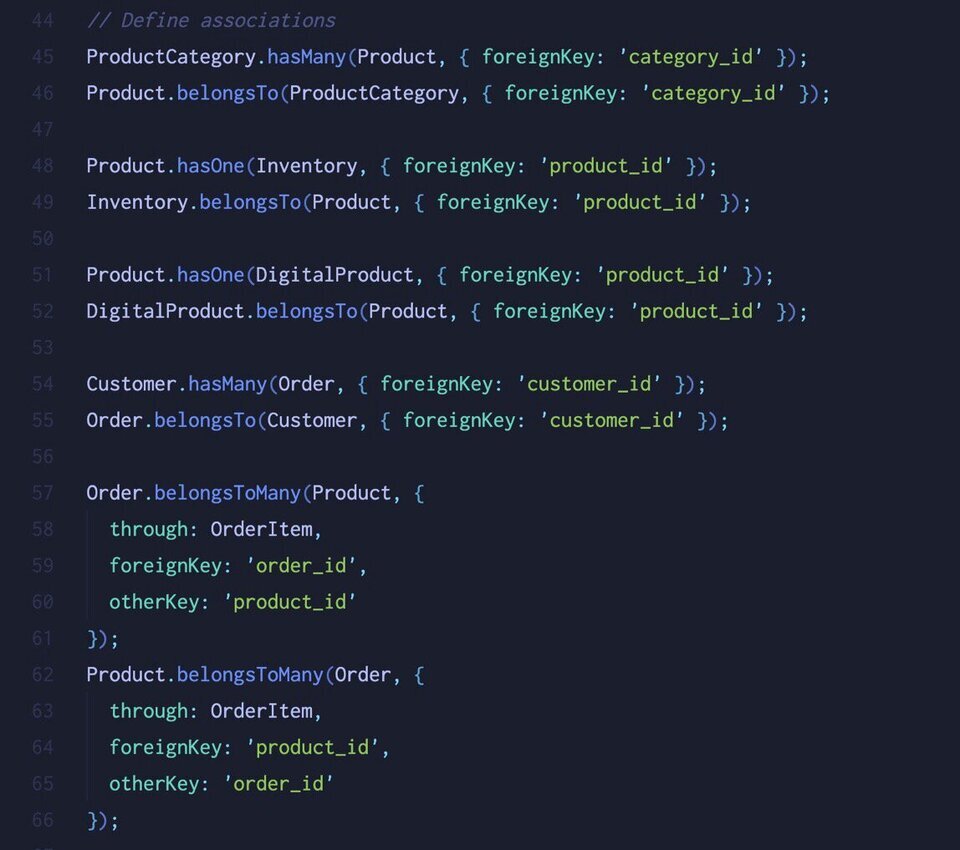
It also wires up relationships between each model, including the many-to-many between Order and Product:
This is all good stuff, but Claude Sonnet did what Claude Sonnet does and added a few "extras" that might be useful, or might not.
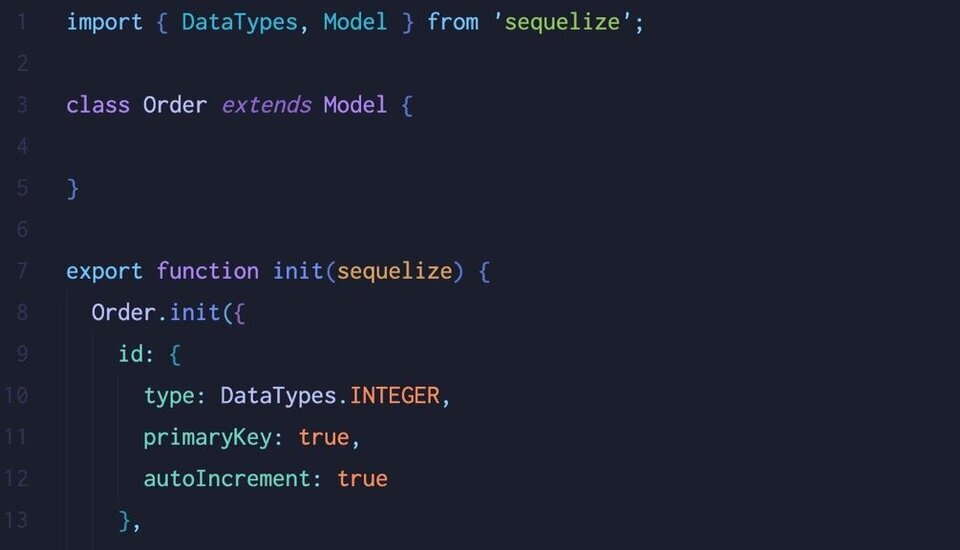
For instance, here's our Order model class:
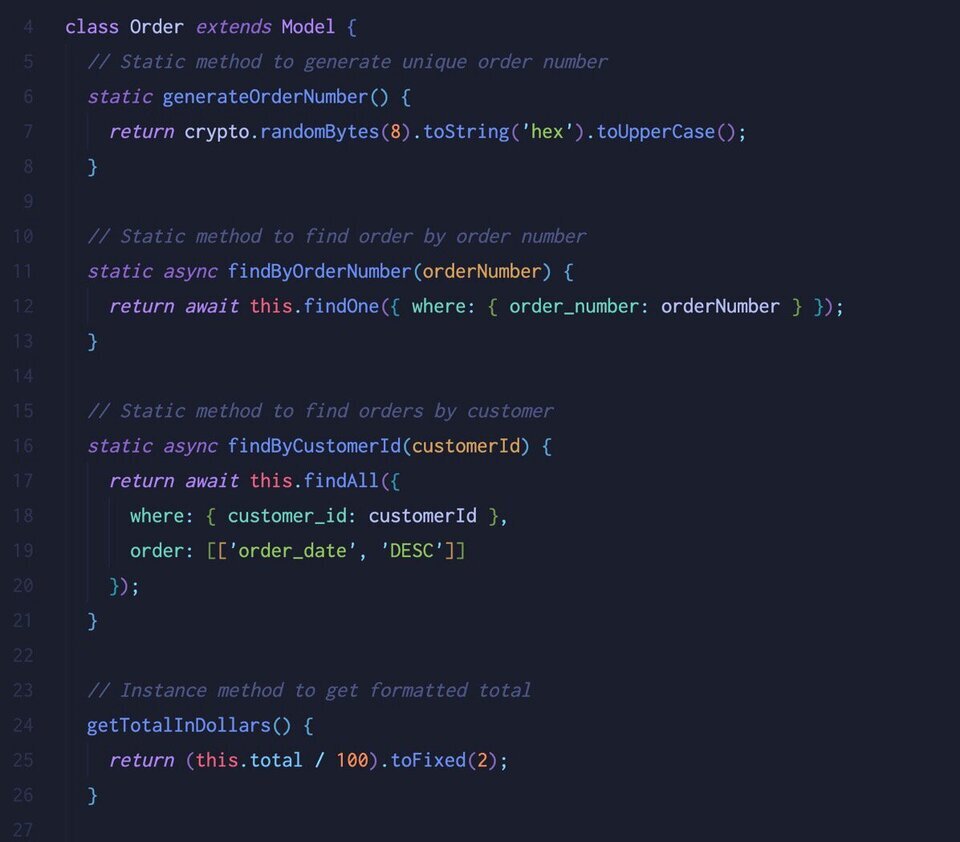
Claude created a few static "nice to have" methods that we didn't ask for, but do seem useful. The problem with this kind of thing, however, is writing code without a mandate. All code needs to be supported, and if you want to drive a project lead crazy, write code you weren't asked to write…
Step 5: One More Time, Without Cruft
Let's back out our changes and go back one commit. We'll run the same prompt as before, but this time we'll add a nudge to not create any extra methods.
- Copy the contents of
copilot-instructions.mdbecause when we revert, the instructions will also be reverted. We want to keep these. - Revert to the previous commit using
git checkout --. If you've committed your changes already, you can usegit reset --hard HEAD~1to rollback to the previous commit. - Paste the instructions back into
copilot-instructions.md. - Create a new chat session using the plus icon in the top right of the Copilot pane.
- Add the prompt
create the data access layer but don't add any extra methods
This time we should have a more concise result, which we do:
Step 6: Commit!
At this point, it's critical to commit what we've done as we're happy with the result and want to be sure we can come back here.
- Commit the changes using the source control pane or by hand, whichever you prefer.
- Checkout the
mainbranch and merge the changes.
Good to go!
A focused workshop for working developers who need to use AI right now, in real projects, under real time pressure.